Final Reflection
Discuss the 2 tools that were your personal favorites from the semester and why.
Adobe Spark Video and Pic Collage

|

|
This semester I learned how to use many different apps in Ed Tech. I don’t know that I will use all of them in the future, but I think it’s good to at least know about them and to know the various technology apps and options that are out there. However, there are two apps that I have used more than once during this semester that I know I will definitely use in my future classroom. Also, almost all the apps we used this semester were free, which was nice.
One app is Adobe Spark Video. I really liked using this app because of its simplicity. I have grown my technology skills in this class over the semester, but it was a class I was hesitant about in the beginning because I do not consider myself to be a “technology person” or very good at using technology. However, Adobe Spark Video is extremely simple, and people of all ages could easily use it. I also thought it was neat that during a class discussion, a student said his grandma could even use it when he interviewed her for a project. Besides the simplicity of using this app, the final product turns out very neat, creative, and professional looking.
This app allows you to use your own photos, search for pictures within the app, use ones found on the Internet. Everything you need to do to create an Adobe Spark Video can be done with the touch of a button: changing the theme, inserting pictures, inserting text, recording your voice, and adding music. Adobe Spark Video is great! Also, I think the fact that you can record slide by slide and as many times as needed just by holding the record button is a really great feature for all users, but especially for kids. Like I said earlier, I don’t consider myself to be a “technology person,” therefore, I was also really grateful that there were music options right on the app that I could use for my video. Last, it was easy to publish and to add the photo credits, which are both important steps to finalizing your project. I used Adobe Spark Video for a project about Martin Luther King, Jr. and for my Kansas Voices Project, “All About Kansas.” I also used this app in a group project in my Core Teaching class, however I don’t have the link to this project because it was created on another person’s Adobe Spark Video account. It was easy to use as a group though because each person could record their part of the presentation easily and quickly..
Even though I really liked this app, I wish it allowed more customization such as changing the fonts, sizes, and colors or choosing different backgrounds for each slide instead of all the slides being the same set theme you choose when starting the video. It would also be cool to be able to add videos within the Adobe Spark Video. However, I do like this app and I see myself being able to use it in my classroom no matter what grade I teach.
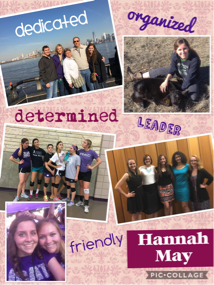
Another app I really liked using this semester was Pic Collage. Once again, a main reason I liked using this app was because of the simplicity, yet the neat and professional appearance of the final product. I created several projects with this app such as an introduction of myself for my Core Teaching Lab class (shown below). I also created a Pic Collage for a lesson plan about the lifecycle of a butterfly, which I then put into another app called ThingLink (another app I enjoyed using). The last project I created this semester was a tutorial for Pic Collage. It also included ideas of how to use it in the classroom. To create the tutorial, I took screen shots of the step-by-step process of creating a Pic Collage. I then put those pictures into an app called Explain Everything. I noticed that Pic Collage recently updated their app, so some screen shots may look different than what the app looks like now. Nevertheless, it is still a tutorial that you should be able to follow because the process is still the same, basic steps as it was before the update.
Pic Collage is super easy to use (check out my tutorial that I discussed above). It can do so many things at the click of a button just like Adobe Spark Video. You can choose a background, insert you own photos or photos from the Internet, add text, and add stickers. You can change the size of the pictures and position them however you would like by touching/holding on them to drag them. You can also change the font, the color, and the font size. Another option is using photo grids which you can put pictures into a variety of different arrangements. There are so many options with this app, and even though you can make in-app purchases, there are plenty of free options too.
I can see myself using this in my future classroom because it is simple, yet creative and neat. Students could create collages for fun, create educational posters, or use it as a way to present a project. This is also an app that can easily be smashed with other apps, such as ThingLink or Explain Everything. By app smashing, you can further enhance the project and make it interactive. This is an app that students of all ages could use and could make creative projects with, even if they don’t feel like they have much creativity. Overall, I really like this app, and I can see how it can be used for so many things both educationally and for fun.
Reflect on what you have accomplished & learned this semester
I have learned so much this semester and have become more comfortable with using technology. I think I have a more open mind about technology, using it, and incorporating it into my future classroom. Before this class, I viewed technology as something I wasn’t good at or comfortable with. Even though, I am still not super confident in my technology abilities, I am more comfortable with using technology and seeing how it can be integrated into lesson plans and the classroom. Also, using some apps and websites, such as Weebly and Twitter are much less confusing than they were in the beginning of the semester. Looking back over the course of this semester, I have successfully created more projects and used more technology of all types than I was comfortable with at the beginning of the semester.
From this course there are several apps I may or may not use in my future classroom, but I am happy to at least know what is available and to know which ones worked best for me (which I can continue to use and incorporate into lesson plans!). Besides learning about various apps and websites, I learned and explored multiple teacher blogs. Some of these blogs were really neat, and I discovered some great ideas and strategies that I can use in my future classroom. Check out the tab titled "Reviews" at the top of my webpage to read about some of my favorite blog posts I've read this semester. I got some really great tips and insight from these blogs and amazing teachers!
Additionally, I liked creating our own websites. Although it was frustrating at times (sometimes when I would update the app, it would change my fonts/sizes/page layout), it was neat to see all of my work from this semester in one place. It also gave me a sense of accomplishment that I was able to use all of this technology, create projects, and then be able to display it all on my website, which I created as well. It is also a good first step as to see how teacher and classroom websites could and should be set up and used. By reading other blogs, I got the opportunity to see how other teachers set up their pages and how they are incorporating them into their classrooms. Even though I was hesitant about technology and using it in the classroom in the beginning of the semester, I have grown to be more confident and comfortable with it. Additionally, I have seen how it can be beneficial, creative, and engaging for students in the classroom.
